Prior Extinction Wellbeing System
Keep icons transparent, stack growth and Amber buffs, and stop invisible nerfs from emptying your build.
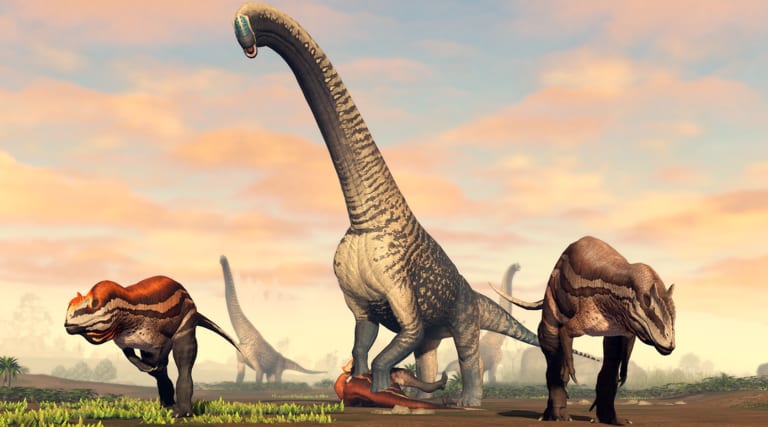
Wellbeing is the hidden gear score of Prior Extinction. Combat animations look flashy, but the N menu decides whether your dinosaur grows like an investment or starves like a cautionary tale. This guide explains the six pillars players watch constantly—Temperature, Social, Cleanliness, Nutrition, Energy, and Sun—how icon brightness works, what full versus empty Wellbeing does to Amber and damage, and how to maintain the system during Recode-era Survival.
Opening the Wellbeing menu
Press N on PC to open the Wellbeing window. Like the main menu, it frees the cursor so you can inspect tabs safely while idle in cover. Mobile players use the on-screen Wellbeing control from the circular action flow described in controls and keybinds. You do not need the full panel every moment: status icons along the bottom of the HUD already show which pillars need attention.
Icon rule of thumb used across official community documentation: bright, obvious icons mean that category is low and urgent. Icons that fade toward transparency mean the category is healthy. Train yourself to glance at the bar the same way you glance at stamina.
Inside the window you typically see categories for Wellbeing values, Information, Boosts, and a large dinosaur panel. Information is not fluff—it lists species-specific preferences for temperature bands, diet, and social tolerance. Boosts shows the live percentage modifiers currently applied to Amber, growth, damage, drains, and mitigation. If numbers feel wrong, check Boosts before assuming a bug.
The six pillars
Temperature
Temperature Wellbeing rises when you live in climates your species likes and falls when you force a desert animal into cold crags or a highland creature into baking flats. Community breakdowns often cite roughly -20% Growth and Amber at zero Temperature Wellbeing and about +20% Amber and Growth at full Temperature Wellbeing. Use the biomes and map guide to relocate instead of tanking a bad climate for scenery.
Social
Social tracks packing and isolation relative to your dinosaur’s preference. Some animals want company; others hate crowds. At empty Social, expect damage loss plus Amber and Growth penalties (commonly cited around -10% damage and -20% Amber/Growth). At full Social, expect the reverse style of buffs, including about +20% damage with matching Amber and Growth upsides. Roars (1/2/3), pack invites, and simply existing near the right density of allies all matter. Nesting-focused players should pair this section with nesting and packs.
Cleanliness
Cleanliness affects infection, bleed, and bone-break reduction alongside Amber and Growth. Use T to clean when your kit allows, avoid rotting messes when you can, and treat dirty icons as combat risk—not only as an economy debuff. Full Cleanliness contributes to the widely cited +25% reduction style bonuses when Wellbeing is stacked high across the board.
Nutrition
Nutrition is food and water discipline. Press E to eat or drink when interactables allow. Empty Nutrition accelerates other failures because food and water drain penalties stack with low Energy and Temperature mistakes. Information tab diet notes tell you whether you are chasing carcasses, fish, or specific plants. Carnivores who wander plant-heavy biomes without prey routes will watch Nutrition collapse even if Temperature looks fine.
Energy
Energy is the stamina lifestyle stat. Rest with R to recover, then sleep with Z after you are already resting when you need deeper Energy Wellbeing recovery. Sleeping replenishes stamina and health faster than resting alone and is called out as the path that restores Energy Wellbeing. Night fighters who never sleep eventually hit a wall even if they “win” skirmishes.
Sun
Sun Wellbeing tracks exposure relative to what your species wants. Shade camping or open basking is not cosmetic roleplay; it is a pillar that feeds the same Boosts panel as Nutrition. If Sun is bright on the HUD, change micro-position—tree line, cliff shadow, or open fern flats—before you start a long quest timer.
Full Wellbeing versus empty Wellbeing
When every pillar is healthy, Prior Extinction’s documented full-Wellbeing package is enormous: about +50% Amber and Growth, about +20% damage, stronger infection/bleed/bone-break reduction around the +25% range, and roughly -50% food and water drain. That means safer fights, faster adults, and denser Amber ticks for the same playtime.
When Wellbeing is empty, the headline punishment is about -50% Amber and Growth, with matching combat and sustain pain. Many players misread this as “this dinosaur is bad” when the HUD was screaming for hours. Fixing Wellbeing is often a larger swing than buying a small Amber gamepass.
Passive Amber multipliers from Wellbeing do apply to the per-minute tick. They do not cut Quest, Mastery, or achievement Amber—another reason to keep doing objectives even on a rough life. Details live in how to get Amber.
Maintenance routines that actually work
Build a loop: drink, eat, check icons, adjust biome or shade, socialize or isolate as needed, clean, then rest/sleep before long travel. After combat, do not sprint to the next fight on empty Energy and dirty wounds. After nesting chores, re-check Nutrition because nest deposits spend hunger.
Quest lines sometimes ask you to hold high Wellbeing for timed stretches. Those tasks double as Mastery point farms—see growth and Mastery. If you are learning the game, watch the mid-length habits in getting started and only then optimize Boost percentages.
Combat and Wellbeing together
Damage buffs from Social and full-stack Wellbeing change whether you challenge a water hole. Mitigation from Cleanliness changes whether you disengage after a bleed proc. Low Temperature in the wrong biome makes retreat stamina worse because everything drains faster. Read combat strategies for spacing, but bring a green Wellbeing bar to the fight.
Troubleshooting false emergencies
- Bright icons after a biome hop: wait and correct climate before spending Robux.
- Social low while solo on a pack-preferring dino: invite or migrate to friendlier density; do not only roar spam.
- Energy never recovers: you may be resting without sleeping, or sleeping in danger so you cancel early.
- Nutrition falling despite food: wrong diet interactable, contestants stealing carcasses, or drain multipliers from other empty pillars.
- Boosts look fine but Amber is low: you may be on a low base amber-per-minute species—compare dinosaurs, not only percentages.
Wellbeing is the difference between Prior Extinction feeling fair and feeling cruel. Keep icons transparent, read Information per species, and let Boosts confirm that your lifestyle matches the dinosaur you paid Amber to unlock.
Frequently Asked Questions
Quick answers about Prior Extinction on Roblox.
How do I open Wellbeing in Prior Extinction?
Press N on PC, or use the Wellbeing control on mobile’s on-screen circular menu. The window also frees your cursor for UI clicks.
What do bright Wellbeing icons mean?
Bright icons mean that pillar is low and needs attention. Icons that become transparent indicate healthy values for that category.
How much does full Wellbeing buff Amber?
Full Wellbeing is commonly documented around +50% Amber and Growth, with additional damage and drain benefits. Empty Wellbeing can swing near -50% Amber and Growth.
Does Wellbeing affect quest Amber rewards?
Passive Amber debuffs from low Wellbeing do not cut Quest, Mastery, or achievement Amber rewards. They do affect the per-minute passive tick.
Why is sleep required for Energy?
Rest helps stamina, but sleeping after you are already resting restores Energy Wellbeing and recovers stamina and health faster than rest alone.
Where do I see my live buff percentages?
Open the Wellbeing window with N and check the Boosts category alongside the Amber line that shows current added or deducted percentage.